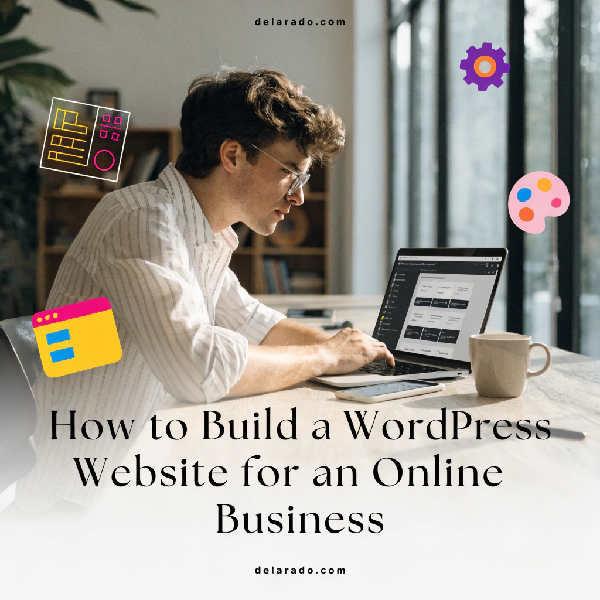
A WordPress website can serve as the foundation of an online business. It gives you a place to explain your offers, publish helpful content, collect email subscribers, sell products or services, build trust, and create an asset you control.
You do not need to be a programmer to build a useful WordPress website. A beginner can start with a domain name, reliable hosting, WordPress, a lightweight theme, a few essential pages, and a clear plan for helping a specific audience.
The goal is not to create the most complicated website. The goal is to build a clean, secure, mobile-friendly site that helps visitors understand what you do and gives them a clear next step.
What Is WordPress?
WordPress is a content management system that lets you create and manage a website without writing every page in code. It is commonly used for blogs, affiliate websites, freelance portfolios, local business sites, online stores, membership communities, course websites, and content-driven brands.
With WordPress, you can create pages, publish blog posts, organize content into categories, add contact forms, install plugins, build landing pages, add email sign-up forms, create product pages, and grow the website over time.
WordPress.org documentation recommends making a plan before installation, then installing and setting up WordPress based on the site’s intended needs. [426]
Why Use WordPress for Business?
A WordPress website can grow with your business. You may start with a simple blog or portfolio and later add email marketing, lead generation, eCommerce, digital downloads, booking tools, memberships, courses, or client portals.
Benefits of WordPress
- You control your website and content.
- You can use a custom domain name.
- You can publish articles for SEO and content marketing.
- You can build an email list.
- You can create landing pages for offers.
- You can add products, services, and payment options.
- You can use themes and plugins to extend functionality.
- You can create internal links between related articles.
- You can improve the site as your business grows.
- You are not fully dependent on one social-media platform.
A business website can support nearly every online marketing channel. Your YouTube videos, Pinterest pins, Instagram posts, email campaigns, Google search results, paid ads, and affiliate promotions can all send visitors back to pages you control.
Choose Your Website Goal First
Before buying a domain or choosing a theme, decide what the website must do. A website for a local service business needs different pages than an affiliate content website or digital-product store.
Common Online Business Website Goals
- Generate leads for a service business.
- Show a freelance portfolio.
- Publish blog posts for SEO.
- Build an email list.
- Promote affiliate products.
- Sell digital products.
- Sell physical products.
- Book consultations or appointments.
- Build a personal brand.
- Host an online course or membership.
Use This Simple Website Statement
This website helps [target audience] solve [problem] and encourages them to [main next step].
Examples
- This website helps beginner bloggers learn WordPress and encourages them to download a website-launch checklist.
- This website helps local contractors get more online leads and encourages them to request a website quote.
- This website helps freelance creators organize content and encourages them to purchase a digital planning template.
This statement will guide your pages, navigation, content, and calls to action.
Step 1: Choose a Domain Name
A domain name is your website address, such as yourbusiness.com. It is one of the first things people may see when they discover your brand, so choose a name that is simple, clear, and easy to remember.
The SBA notes that businesses seeking an online presence should begin by registering a domain name, which is the website address or URL. [381]
Domain Name Tips
- Choose a name that is easy to spell.
- Keep it short when possible.
- Avoid confusing numbers and hyphens.
- Choose a name related to your brand, topic, or audience.
- Check whether matching social-media usernames are available.
- Search for possible trademark conflicts before building around a name.
- Use a common domain extension when appropriate.
- Do not choose a name that is too similar to another company.
Domain Name Examples
- ClearPathWeb.com for a web-design business.
- CreatorWorkflow.com for a productivity-template brand.
- BeginnerSiteGuide.com for an educational blogging website.
- LocalLeadStudio.com for a local marketing service.
Your domain does not need to include every keyword related to your business. A clear, brandable name is often more useful than an overly long keyword phrase.
Step 2: Choose WordPress Hosting
Hosting is the service that stores your website files and makes your website available online. For most beginners, managed or shared WordPress hosting is enough to start.
DreamHost and SiteGround are examples of hosting providers that support WordPress websites. When comparing plans, focus on reliability, security, support, backups, SSL certificates, ease of WordPress installation, and room to grow.
Hosting Features to Look For
- WordPress installation support.
- Free SSL certificate or easy SSL setup.
- Automatic backups.
- Security tools.
- Customer support.
- Reasonable storage and bandwidth.
- Staging site options, if available.
- Easy domain connection.
- Clear renewal pricing.
- Upgrade options as traffic grows.
Do not automatically buy the largest hosting plan. Start with a plan that fits your current needs and upgrade only when your traffic, products, or technical requirements justify the cost.
Step 3: Install WordPress
Most WordPress hosts offer a simple installation process through their account dashboard. In many cases, you choose the domain, create an administrator username and password, then complete the installation in a few minutes.
WordPress Setup Checklist
- Log in to your hosting account.
- Choose the WordPress installation option.
- Select the domain name for the website.
- Create a strong administrator username and password.
- Install an SSL certificate and confirm that HTTPS is active.
- Log in to the WordPress dashboard.
- Update WordPress, your theme, and plugins.
- Delete unused default themes and plugins.
- Set a backup process.
- Set up two-factor authentication if available.
Use a unique password and avoid sharing administrator access unless necessary. If you work with a developer, designer, or virtual assistant, give them the lowest level of access needed for their task.
Step 4: Set Your Basic WordPress Settings
Before building pages, adjust a few WordPress settings. These choices help make the website more professional and easier to manage.
General Settings
- Set your site title.
- Add a short tagline if appropriate.
- Set the correct site language.
- Set your time zone.
- Use a professional business email address.
- Confirm that the site URL uses HTTPS.
Permalinks
Permalinks control your page and post URLs. For most content websites, a clean structure such as:
yourwebsite.com/post-name/
is easier for visitors to understand than a URL filled with numbers or dates.
Discussion Settings
Decide whether you want comments enabled on blog posts. Comments can encourage discussion, but they also require moderation to prevent spam. Many business websites disable comments unless community conversation is part of the strategy.
Step 5: Choose a Lightweight Theme
A WordPress theme controls the basic appearance and layout of your website. A good theme should be responsive, readable, fast, regularly updated, and compatible with modern WordPress features.
Do not choose a theme only because it has hundreds of effects or demo layouts. A clean, fast, accessible theme is usually better for visitors and easier to maintain.
Look for These Theme Features
- Mobile-friendly layout.
- Fast loading speed.
- Regular updates.
- Clear typography options.
- Simple navigation support.
- Compatibility with WordPress blocks.
- Accessibility considerations.
- Good documentation and support.
- Flexible page layouts.
- Minimal unnecessary features.
After installing a theme, customize only what supports your brand. Choose a few brand colors, one or two readable fonts, and a simple layout. Consistency is more important than complex design.
Step 6: Create Your Essential Pages
Before you begin publishing blog posts or promoting your business, create the pages that explain who you are, what you offer, and how visitors can contact you.
1. Homepage
Your homepage should answer three questions quickly:
- What does this business do?
- Who does it help?
- What should I do next?
Homepage Structure
- Clear headline describing the main benefit.
- Short explanation of who you help.
- Main call to action.
- Brief overview of products, services, or content.
- Trust signals such as testimonials, experience, or useful resources.
- Links to key pages.
2. About Page
Your About page should explain who is behind the business, why it exists, who it serves, and why visitors can trust the information or services you provide.
3. Contact Page
Include a contact form, professional email address, expected response time, and any relevant business information. Do not make customers search for a way to contact you.
4. Services or Product Pages
Each offer should have a dedicated page explaining who it is for, the problem it solves, what is included, pricing or pricing guidance, delivery details, and the next step.
5. Blog or Resource Hub
A blog or resource section gives you a place to publish tutorials, guides, reviews, comparisons, case studies, and answers to frequently asked questions.
6. Legal and Policy Pages
Depending on your business, create a Privacy Policy, Terms of Use, affiliate disclosure, refund policy, return policy, shipping policy, cookie notice, and other legally appropriate pages. Requirements vary, so seek qualified advice when needed.
Step 7: Plan Your Website Navigation
Your navigation menu should help people find important information quickly. Keep it simple. Too many menu items can confuse visitors.
Simple Business Website Menu
- Home.
- About.
- Services or Shop.
- Blog or Resources.
- Contact.
Example Menu for an Affiliate Content Website
- Home.
- Start Here.
- Website Building.
- SEO.
- Tools.
- Resources.
- About.
Use categories and internal links to guide visitors from beginner content to deeper guides, recommendations, products, or services.
Step 8: Install Only Essential Plugins
Plugins add features to WordPress, such as contact forms, SEO tools, backups, security, eCommerce, caching, and email forms. They can be useful, but too many plugins can create security, performance, compatibility, and maintenance problems.
Useful Plugin Categories
- Security.
- Backups.
- SEO.
- Caching and performance.
- Contact forms.
- Email marketing integrations.
- Spam protection.
- Image optimization.
- eCommerce, if needed.
- Analytics integration.
Plugin Best Practices
- Install plugins only from reputable sources.
- Read reviews and check when they were last updated.
- Keep plugins updated.
- Delete plugins you do not use.
- Do not install multiple plugins that perform the same job.
- Test major changes before updating a live site.
- Keep a backup before significant updates.
Start with the minimum tools necessary to operate your site. Add more only when they solve a real business problem.
Step 9: Set Up SEO Foundations
Search engine optimization helps search engines understand your pages and can help relevant content appear when people search for answers, products, or services. SEO does not guarantee rankings, but good website structure and useful content give your site a stronger foundation.
Google’s SEO Starter Guide recommends helping Google discover content through links and sitemaps, using descriptive URLs and titles, creating helpful and unique content, organizing pages clearly, and monitoring performance through Google Search Console. [344]
Basic SEO Setup Checklist
- Create clear, descriptive page titles.
- Use one main heading on each page.
- Use headings to organize longer content.
- Create readable page URLs.
- Write useful meta descriptions.
- Add descriptive alt text to meaningful images.
- Link related pages together.
- Create a sitemap.
- Set up Google Search Console.
- Set up Google Analytics.
- Publish unique, helpful content for your audience.
Example URL Structure
- yourwebsite.com/start-a-wordpress-blog/
- yourwebsite.com/best-hosting-for-beginners/
- yourwebsite.com/wordpress-seo-checklist/
- yourwebsite.com/services/website-design/
Do not stuff keywords into titles, URLs, or headings. Write naturally for people, then make sure search engines can understand the topic.
Step 10: Create Your First Helpful Content
A new website should not remain empty. Publish useful pages or articles that answer questions your target audience already has.
First Content Ideas for a Service Business
- What services do you offer?
- How does your process work?
- What should customers prepare before hiring you?
- What common problems do you solve?
- How much does your service generally cost?
- Frequently asked questions.
- Case studies or examples of your work.
First Content Ideas for a Blog or Affiliate Website
- Beginner guide to your topic.
- How-to tutorial.
- Common mistakes article.
- Product comparison guide.
- Tool review.
- Checklist or template.
- Frequently asked questions.
First Content Ideas for a Digital Product Business
- Guide explaining the problem your product solves.
- Behind-the-scenes look at how to use the product.
- Free tips related to the paid product.
- Frequently asked questions.
- Customer stories or use cases with permission.
- Comparison between manual work and using a template or system.
Write for a clear audience. Helpful content can attract visitors, build trust, encourage email sign-ups, and guide people toward relevant products or services.
Step 11: Build an Email List
Website visitors may leave and never return. An email list gives you a way to continue helping people who choose to subscribe.
Create a simple lead magnet: a free resource that solves a small but useful problem for your audience. Then add an email sign-up form to relevant pages.
Lead Magnet Ideas
- Website-launch checklist.
- Beginner WordPress setup guide.
- SEO content-planning worksheet.
- Social-media content calendar.
- Small-business website audit checklist.
- List of beginner-friendly marketing tools.
- Free template or spreadsheet.
Basic Email Setup
- Choose an email marketing platform.
- Create a sign-up form.
- Create a landing page for the lead magnet.
- Write a welcome email.
- Deliver the promised resource automatically.
- Write two or three helpful follow-up emails.
- Send useful updates consistently.
Tools such as MailerLite, HubSpot, ConvertKit, Brevo, ActiveCampaign, and Systeme.io can help you build forms, landing pages, automations, subscriber segments, and email campaigns.
Step 12: Optimize for Mobile Visitors
Many visitors will view your website on a phone. A site that looks good on a desktop but is difficult to use on mobile can lose potential subscribers, leads, and customers.
Mobile-Friendly Website Checklist
- Use a responsive WordPress theme.
- Use readable text sizes.
- Keep buttons large enough to tap.
- Use short paragraphs and clear headings.
- Compress large images.
- Avoid pop-ups that block the whole screen.
- Test forms on a mobile device.
- Check menus and navigation on smaller screens.
- Use clear calls to action.
Test your site on your own phone, tablet, and computer. Ask someone unfamiliar with the business to find your main offer or contact page. If they struggle, simplify the design and navigation.
Step 13: Add Trust Signals
Trust signals help visitors feel more confident that your business is legitimate and accountable. This is especially important if you sell services, products, courses, affiliate recommendations, or subscriptions.
Trust Signals to Include
- A clear About page.
- Professional contact information.
- Privacy Policy and Terms of Use.
- Clear pricing or quote process.
- Secure HTTPS connection.
- Real testimonials with permission.
- Transparent affiliate disclosures.
- Refund, return, or cancellation policies.
- Author bios for expert content.
- Accurate and updated content.
Do not use fake testimonials, fake scarcity, misleading before-and-after claims, false countdown timers, or copied logos. Trust is built through honest communication and positive customer experiences.
Step 14: Test Before Launching
Before announcing your site, review it from a visitor’s perspective. Test every important page, link, form, button, and checkout process.
Pre-Launch Checklist
- Check that HTTPS is active.
- Review every navigation link.
- Test contact forms.
- Test email sign-up forms.
- Test checkout or payment flows if applicable.
- Check the site on mobile devices.
- Proofread important pages.
- Check image sizes and loading speed.
- Confirm Privacy Policy and Terms pages are live.
- Review affiliate disclosures if applicable.
- Set up Google Analytics.
- Set up Google Search Console.
- Submit your sitemap if appropriate.
- Back up the website.
Google recommends using Search Console to monitor search performance and technical issues. It can help you confirm whether pages are indexed, identify crawl or mobile usability issues, and review the search queries that bring visitors to your site. [344]
Simple Website Structure Examples
Service Business Website
- Home.
- About.
- Services.
- Portfolio or Case Studies.
- Blog.
- Contact.
- Privacy Policy.
- Terms of Use.
Affiliate Content Website
- Home.
- Start Here.
- Beginner Guides.
- Tool Reviews.
- Comparisons.
- Resources.
- About.
- Affiliate Disclosure.
- Privacy Policy.
Digital Product Website
- Home.
- Shop.
- Product Categories.
- Free Resources.
- About.
- Contact.
- Frequently Asked Questions.
- Refund Policy.
- Privacy Policy.
Common WordPress Website Mistakes
- Choosing a vague website purpose.
- Using a confusing domain name.
- Installing too many plugins.
- Using outdated themes or plugins.
- Ignoring website backups.
- Forgetting to activate HTTPS.
- Creating a desktop-only design.
- Publishing pages with no clear call to action.
- Using copied, inaccurate, or low-value content.
- Ignoring contact details and legal pages.
- Not setting up analytics or Search Console.
- Expecting traffic immediately after launch.
Final Thoughts
Building a WordPress website for an online business does not require advanced coding or a large budget. Start with a clear audience, a useful business goal, a simple domain name, reliable hosting, a lightweight theme, essential pages, and helpful content.
Focus on usability, trust, and clarity. Make it easy for visitors to understand what you do, learn from your content, contact you, join your email list, or purchase a relevant offer.
Your website does not need to be perfect before launch. Build a useful version, test it, listen to visitors and customers, and improve it over time.
Frequently Asked Questions
Can I build a WordPress website without coding?
Yes. WordPress allows beginners to create pages, posts, menus, forms, and basic layouts without writing code. Coding can be helpful for advanced customization, but it is not required to build a functional business website.
How much does it cost to build a WordPress website?
Costs vary based on your domain, hosting, theme, plugins, design, and business needs. A simple website can start with a domain name, basic hosting, and free WordPress tools. More complex stores, memberships, or custom designs may cost more.
Do I need WordPress.com or WordPress.org?
WordPress.com is a hosted platform that can simplify setup, while WordPress.org software is typically installed on hosting you choose and provides greater flexibility and control. Choose based on your technical comfort, budget, and business needs.
What pages should a business website have?
Most business websites need a homepage, About page, Contact page, product or service pages, Privacy Policy, Terms of Use, and a blog or resource section. Add refund, shipping, affiliate disclosure, and FAQ pages where relevant.
How many plugins should I install?
Install only the plugins you need. The right number depends on the site, but fewer well-maintained plugins are usually easier to secure and manage than many overlapping plugins.
How do I get visitors to my WordPress website?
You can attract visitors through SEO, helpful blog content, email marketing, YouTube, Pinterest, social media, partnerships, referrals, local search, direct outreach, and paid ads. Start with one or two channels that fit your audience.
How long does it take for a new WordPress website to get traffic?
There is no guaranteed timeline. Traffic depends on your niche, content quality, SEO, promotion, competition, audience demand, and consistency. Build helpful content and use Google Search Console to track visibility and improve over time.